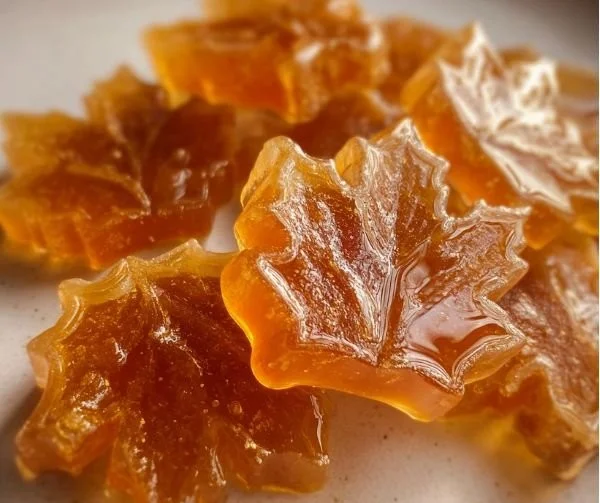
Homemade maple syrup candy is a tiny, elegant treat that tastes like concentrated autumn — buttery, caramelized maple with a melt-in-your-mouth texture. I make it every winter because it’s a quick, impressive gift and takes just a few pantry ingredients. For a different holiday twist I sometimes pair it with other simple sweets, like a crockpot candy I tested recently: amazing crockpot candy.
Why Make This Recipe
- Pure, rich maple flavor that’s far superior to pancake syrups.
- Minimal ingredients: just maple syrup (and optional salt or vanilla).
- Fast to make — you can finish a batch in under an hour.
- Great for gifts, party favors, or a sweet seasonal snack.
- I love this recipe because the entire house smells like maple while it cooks, and small batches let me experiment with molds and textures (I once swapped in smoked maple for a savory note and loved the result). Check a related festive idea like this holiday crockpot candy for party pairings.
Recipe Overview
- Prep time: 5 minutes
- Cook time: 15–25 minutes (to reach temperature)
- Total time: 30–40 minutes (including cooling/setting)
- Servings: about 12 small candies (from 2 cups maple syrup)
- Difficulty: Easy–Medium (requires candy thermometer and attention)
- Method: Boil pure maple syrup to soft-ball temperature, cool to a working range, then beat or pour into molds to set.
My Experience Making This Recipe
I tested this recipe multiple times to dial in the temperature and texture. Early attempts either stayed too soft or got grainy; learning to watch the thermometer and cool to the correct stage fixed both problems. Using a heavy-bottomed pan and stirring at the right moments gave consistently creamy candies.
How to Make Homemade Maple Syrup Candy
Start with 2 cups pure maple syrup in a 2–3 quart heavy-bottomed saucepan and bring to a boil over medium heat. Use a candy thermometer and cook to 235°F (112°C) — the soft-ball stage — then remove from heat and let cool undisturbed to about 140°F (60°C). Beat vigorously with a wooden spoon (or stand mixer on low) until the mixture becomes thick, lightens in color, and holds shape; then spoon or press into silicone molds or a parchment-lined pan to set. Expect sticky steam while boiling and a glossy syrup that turns opaque as it creams.
Expert Tips for Success
- Use only 100% pure maple syrup (Grade A or darker for stronger flavor); pancake syrups contain corn syrup and won’t set properly. Link to a simple dessert pairing like this apricot cheesecake galette if you want to serve together.
- Use a heavy-bottomed saucepan to prevent hotspots and burning; stir gently as it approaches temperature.
- A candy thermometer is essential — aim for 235°F (soft-ball). If you overshoot to 245–250°F you’ll get firmer brittle instead of creamy candy.
- Cool to about 140°F (60°C) before beating; too-hot means it stays runny, too-cool can grain. Use a wooden spoon or low-speed stand mixer to beat until opaque. For clean releases, use silicone molds or line a small pan with parchment.
- Skim foam during the boil with a small spoon for clearer texture, and avoid introducing water or contaminants which can cause crystallization. If crystals form, reheat gently and strain.
How to Serve Homemade Maple Syrup Candy
- Arrange on a platter with nuts and dark chocolate squares for an elegant dessert board.
- Wrap individually in cellophane or wax paper twists for party favors or holiday gifts.
- Serve small pieces after a winter soup or roast; the intense maple pairs well with savory mains.
- For casual fun, pour warm syrup onto clean snow (or crushed ice) for traditional maple taffy — but only after heating to the correct temperature.
Storage and Reheating Guide
Store candies in an airtight container at cool room temperature for up to 2 weeks. For longer storage, freeze in single layers between parchment for up to 3 months; thaw in the fridge before unwrapping. If candy softens, chill in the refrigerator 30–60 minutes to firm; avoid microwaving (it melts unevenly). For reheating a sticky pan, gently warm over low heat until pourable, then cool and re-beat as needed.
Recipe Variations
- Dairy-free maple cream: This recipe is naturally dairy-free when made with only maple syrup; add a pinch of sea salt for balance.
- Maple butter (spreadable): Heat to soft-ball, cool, then beat longer until very smooth for a spreadable consistency. Serve on toast or pancakes.
- Smoky maple: Use smoked maple syrup or add a few drops liquid smoke for a savory-sweet candy.
- Nut-studded: Fold in finely toasted pecans or walnuts just before filling molds for texture and flavor; ensure pieces are small so candies set evenly. You can pair pieces with baked maple-glazed donuts like these maple-glazed pumpkin donuts for brunch.
Nutritional Highlights
Maple candy is concentrated sugar — primarily sucrose and minerals from pure maple syrup. It provides small amounts of manganese and zinc but is calorie-dense, so enjoy in small portions (one candy or ~10 g). Allergen note: this recipe is naturally gluten-free and dairy-free when made without added butter; add-ins like nuts will introduce tree-nut allergens.
Troubleshooting Common Issues
- Candy is too soft: You likely didn’t reach 235°F (soft-ball). Reheat gently to the proper temperature and cool, then beat again.
- Candy is grainy/crystallized: This often comes from introducing sugar crystals or cooling too quickly. Reheat to 240°F, strain if needed, and then cool and beat properly.
- Burnt flavor: High heat or a thin pan can scorch syrup. Discard burned batches; start again in a heavy-bottomed pan and cook over medium heat.
Frequently Asked Questions
Q: Can I use pancake maple-flavored syrup?
A: No — commercial pancake syrups contain corn syrup and additives that prevent proper setting and won’t yield the authentic texture or flavor. Always use 100% pure maple syrup.
Q: What’s the difference between maple taffy and maple candy?
A: Maple taffy (sugar-on-snow) is poured hot onto snow or ice and eaten immediately as a soft taffy; maple candy is cooled, beaten, and molded to create a stable, creamy piece. Both start at similar temperatures but finish differently.
Q: Can I make this at high altitude?
A: Yes, but you must adjust final temperature higher (typically add 2–6°F depending on altitude). Use a calibrated candy thermometer and test small drops in cold water to check consistency.
Q: How do I prevent boil-over while cooking?
A: Use a large, heavy-bottomed saucepan and reduce heat slightly as the syrup foams. Keep a wet pastry brush nearby to wipe down pot sides; stirring gently near the end prevents sudden foaming.
Conclusion
If you want a tested reference or a slightly different technique, this simple Pure Maple Candy Recipe is a helpful guide and inspiration: Pure Maple Candy Recipe. For more seasonal treats and serving ideas, remember simple pairings like baked goods and small homemade sweets.
Print
Homemade Maple Syrup Candy
- Total Time: 30 minutes
- Yield: 12 small candies
- Diet: Gluten-Free, Dairy-Free
Description
A tiny, elegant treat that captures the rich, buttery flavor of maple, perfect for gifts or as a seasonal snack.
Ingredients
- 2 cups pure maple syrup
- Optional: pinch of salt or vanilla
Instructions
- In a 2–3 quart heavy-bottomed saucepan, bring maple syrup to a boil over medium heat.
- Use a candy thermometer and cook to 235°F (112°C) — the soft-ball stage.
- Remove from heat and let cool undisturbed to about 140°F (60°C).
- Beat vigorously with a wooden spoon or stand mixer on low until thick and opaque.
- Spoon or press into silicone molds or a parchment-lined pan to set.
Notes
Use 100% pure maple syrup for best results. A heavy-bottomed saucepan is essential to prevent scorching.
- Prep Time: 5 minutes
- Cook Time: 25 minutes
- Category: Candy
- Method: Boiling
- Cuisine: American