Indulging in a sweet treat that warms both the heart and the palate is a special joy, and these Hot Chocolate Cookie Cups deliver exactly that. Fluffy, rich cookies filled with molten chocolate make for an irresistible dessert that showcases the cozy spirit of winter. After testing this recipe in my own kitchen, I can confidently say it’s a delightful treat worth trying for any occasion.
Why Make This Recipe
- Decadent Flavor: These cookie cups combine the classic flavors of hot chocolate with a chewy cookie base, creating a nostalgic taste that brings back childhood memories.
- Easy to Make: With simple ingredients and straightforward steps, you can whip up a batch without any culinary stress.
- Versatile Treat: Perfect for holiday gatherings, cozy nights in, or as a delightful surprise for friends. They are sure to impress!
- Fun for All Ages: Kids will love joining in the preparation, making it a wonderful family activity.
- Personal Insight: I love how these cookie cups turn out perfectly every time, and they are always a hit at gatherings. The joy of watching someone’s face light up when they discover the gooey chocolate center is priceless.
Recipe Overview
- Prep Time: 15 minutes
- Cook Time: 10-12 minutes
- Total Time: 25-30 minutes
- Servings: 12 cookie cups
- Difficulty Level: Easy
- Cooking Method: Baking
These Hot Chocolate Cookie Cups are baked in a muffin tin, where the cookie batter forms a delightful shell around a gooey chocolate filling.
My Experience Making This Recipe
While perfecting these cookie cups, I had a few fun moments of trial and error. Initially, I found that not all chocolate worked in the center – some melted too quickly and left a watery mess. After experimenting with different chocolate types, I settled on using milk chocolate for its perfect melting consistency. The end result was a deliciousness that was worth every test!
How to Make Hot Chocolate Cookie Cups
Making these cookie cups starts with preparing your cookie dough, blending together butter, sugar, and eggs with flour and cocoa powder. Once your dough is mixed, you will scoop portions into a muffin tin, creating an impression in each one to hold the melted chocolate. Bake until the edges are firm, but the centers remain soft and gooey. With just a little patience and attention to timing, you will create delightful chocolate cups that are perfectly chewy on the outside and decadent within.
Expert Tips for Success
- Chill the Dough: If the dough is too soft, chill it in the refrigerator for about 20 minutes before scooping. This prevents spreading during baking and helps maintain the cup shape.
- Use Quality Chocolate: Choose high-quality chocolate for the filling. I recommend using a chocolate bar rather than chocolate chips for a richer, more indulgent center.
- Monitor Bake Time: Start checking your cookie cups at the 10-minute mark. They should feel set around the edges but still slightly underbaked in the center for that gooey effect.
- Non-Stick Sprays: Lightly grease your muffin pan to ensure easy removal. Alternatively, use silicone muffin cups for a truly non-stick experience.
- Let Them Cool: Allow the cookie cups to cool in the tin for about 5 minutes before transferring them to a wire rack. This helps them firm up and makes handling easier.
How to Serve Hot Chocolate Cookie Cups
- Garnish: Dust with powdered sugar or drizzle with melted white chocolate for a festive touch.
- Accompaniments: Serve with a dollop of whipped cream or a scoop of vanilla ice cream for an extra indulgent dessert.
- Presentation: Arrange on a decorative platter and sprinkle some mini marshmallows around for a whimsical, winter-themed display.
- Occasions: These cookie cups are perfect for holiday parties, cozy movie nights, or as a simple treat for family after dinner.
Storage and Reheating Guide
Store any leftover Hot Chocolate Cookie Cups in an airtight container at room temperature for up to three days. For longer storage, freeze them in a single layer on a baking sheet, then transfer to a freezer-safe bag for up to three months. To reheat, pop them in the microwave for about 10-15 seconds to soften the chocolate again, or warm in a preheated oven at 350°F (175°C) for 5-7 minutes.
Recipe Variations
- Gluten-Free: Substitute all-purpose flour with a 1:1 gluten-free baking blend for a delightful gluten-free option.
- Dairy-Free: Use dairy-free butter and chocolate to make this treat suitable for those with dairy sensitivities.
- Flavor Twists: Add a teaspoon of peppermint extract to the dough for a minty twist or a pinch of sea salt on top before baking for an enhanced flavor experience.
- Nutty Addition: Mix in some chopped nuts like hazelnuts or walnuts for added texture.
Nutritional Highlights
These cookie cups offer a delightful indulgence but also provide a few nutritional benefits. Milk chocolate contains antioxidants, and the use of eggs offers a source of protein. However, portion sizes are key, as these treats are higher in calories—enjoy them in moderation!
Troubleshooting Common Issues
- Cookie Cups Too Hard: If they bake too long and become hard, check your oven temperature with an oven thermometer. Every oven can vary slightly.
- Chocolate Didn’t Melt Properly: Ensure the chocolate is chopped finely before adding it to the center. You can also microwave it gently in short bursts to pre-melt before pouring it into the cups.
- Cookie Cups Sticking to the Pan: If they stick, consider spraying the muffin tin with non-stick spray or using silicone liners next time for easy removal.
Frequently Asked Questions
-
Can I use dark chocolate?
Yes, dark chocolate can be used! It will provide a richer flavor, but ensure it’s well-tempered for the best melting quality. -
What happens if my cookie cups spread too much?
If your cookie cups spread excessively, your dough may have been too warm. Next time, consider chilling it longer before baking. -
Can I make the dough ahead of time?
Absolutely! You can prepare the cookie dough a day in advance. Just wrap it tightly in plastic wrap and refrigerate. Bring it back to room temperature before scooping. -
How do I know when they are done?
The edges should look firm, while the center should still be soft and slightly puffed. The cookies will continue to set slightly as they cool in the pan.

Hot Chocolate Cookie Cups
- Total Time: 30
- Yield: 12 cookie cups
- Diet: Vegetarian
Description
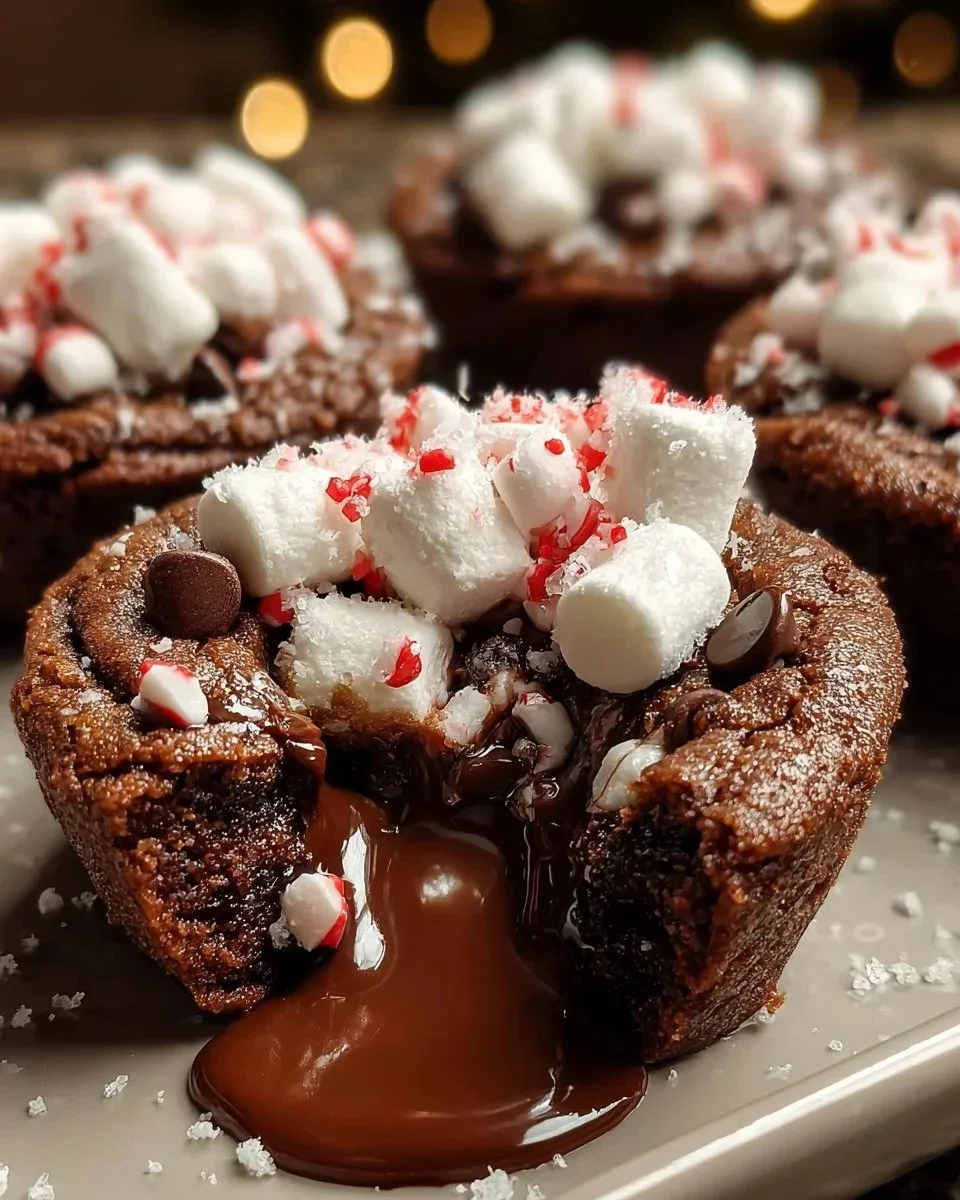
Delightful cookie cups filled with molten chocolate, perfect for cozy gatherings or festive occasions.
Ingredients
- 1 cup unsalted butter, softened
- 1 cup granulated sugar
- 2 large eggs
- 2 cups all-purpose flour
- ½ cup cocoa powder
- 1 cup milk chocolate, chopped
- Powdered sugar (for dusting)
- Optional: Whipped cream or vanilla ice cream for serving
Instructions
- Preheat the oven to 350°F (175°C).
- In a large bowl, cream together the butter and sugar until fluffy.
- Add the eggs and mix until combined.
- Gradually add the flour and cocoa powder, mixing until a dough forms.
- Scoop portions of dough into a greased muffin tin, pressing down in the center to create a cup shape.
- Place chopped milk chocolate in the center of each cookie cup.
- Bake for 10-12 minutes, until edges are set but centers are still soft.
- Allow to cool in the tin for 5 minutes before transferring to a wire rack.
- Dust with powdered sugar and serve with whipped cream or ice cream, if desired.
Notes
Chill the dough if it becomes too soft to maintain shape. Use quality chocolate for the best melting consistency.
- Prep Time: 15
- Cook Time: 12
- Category: Dessert
- Method: Baking
- Cuisine: American